

I love Fifine microphones in general. One notable trait about most Fifine microphones is that they sound great straight out of the microphone, but they’ve always had this one limitation; their mics are just 16 bit.
But those days are over. Enter the Fifine Profile 3.
It doesn’t explicitly say it in the box, but this is finally a 24-bit microphone, meaning you’ll have more flexibility when editing your audio in post.
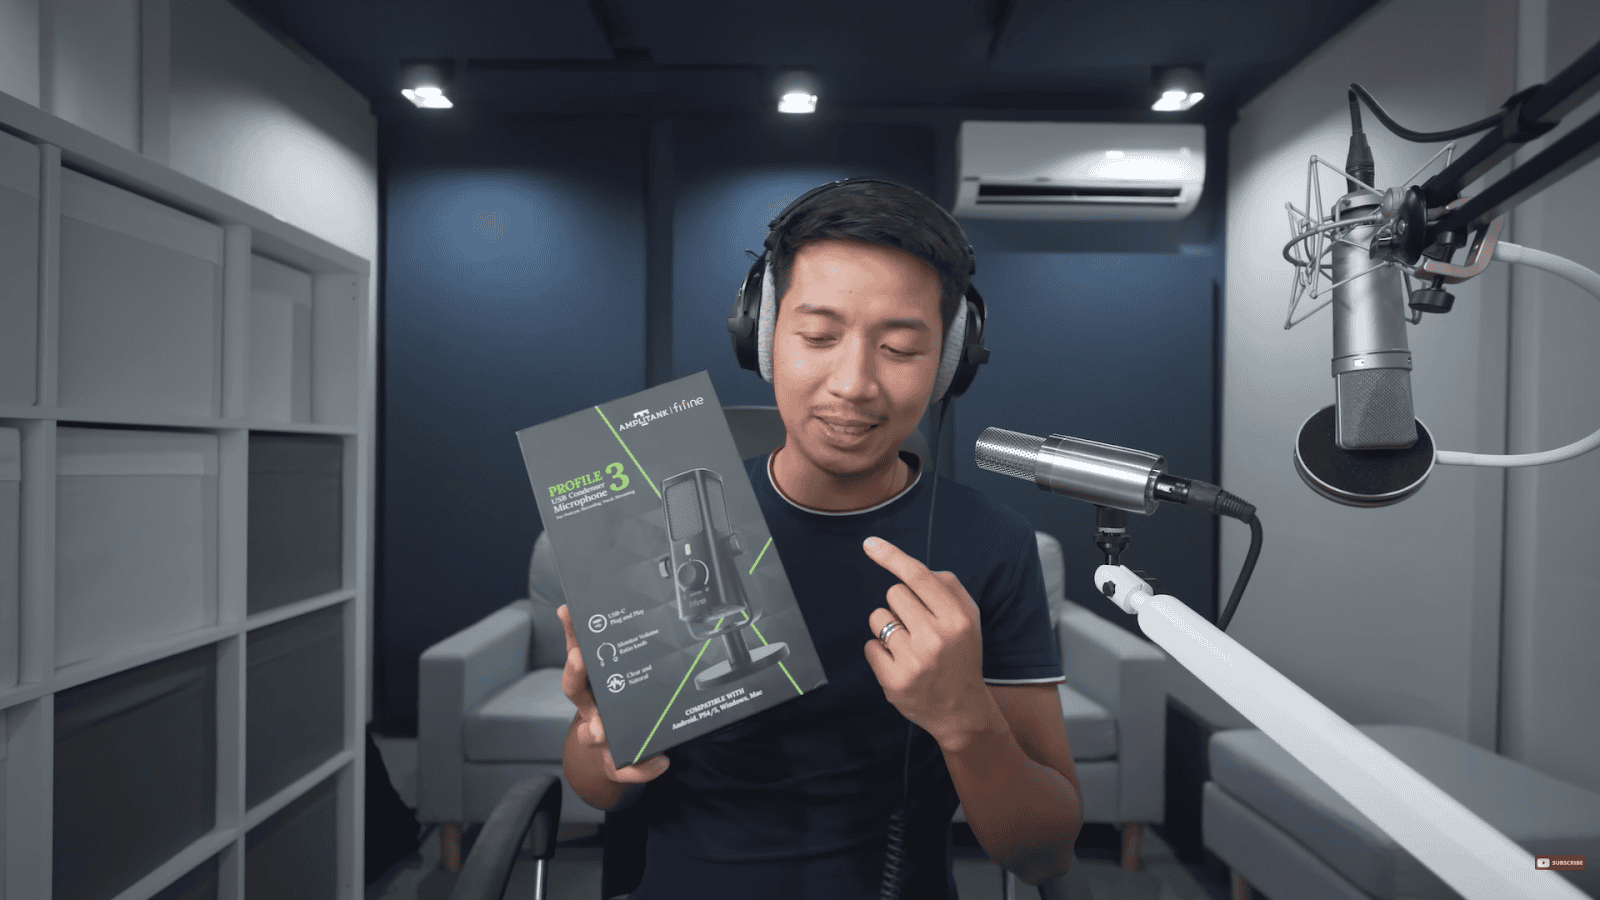
The question now is that the Fifine Profile 3 good enough for professional recording? There’s only one way to find out. Let the unboxing begin.
By the way, disclaimer that the Fifine did send me the Profile 3, but everything I say in this video are my thoughts only.
Unboxing
Unboxing the mic, it’s got a signal-to-noise ratio of 77 dB, which in my experience is pro-level. With this, your voice would sound loud enough while having less preamp noise.
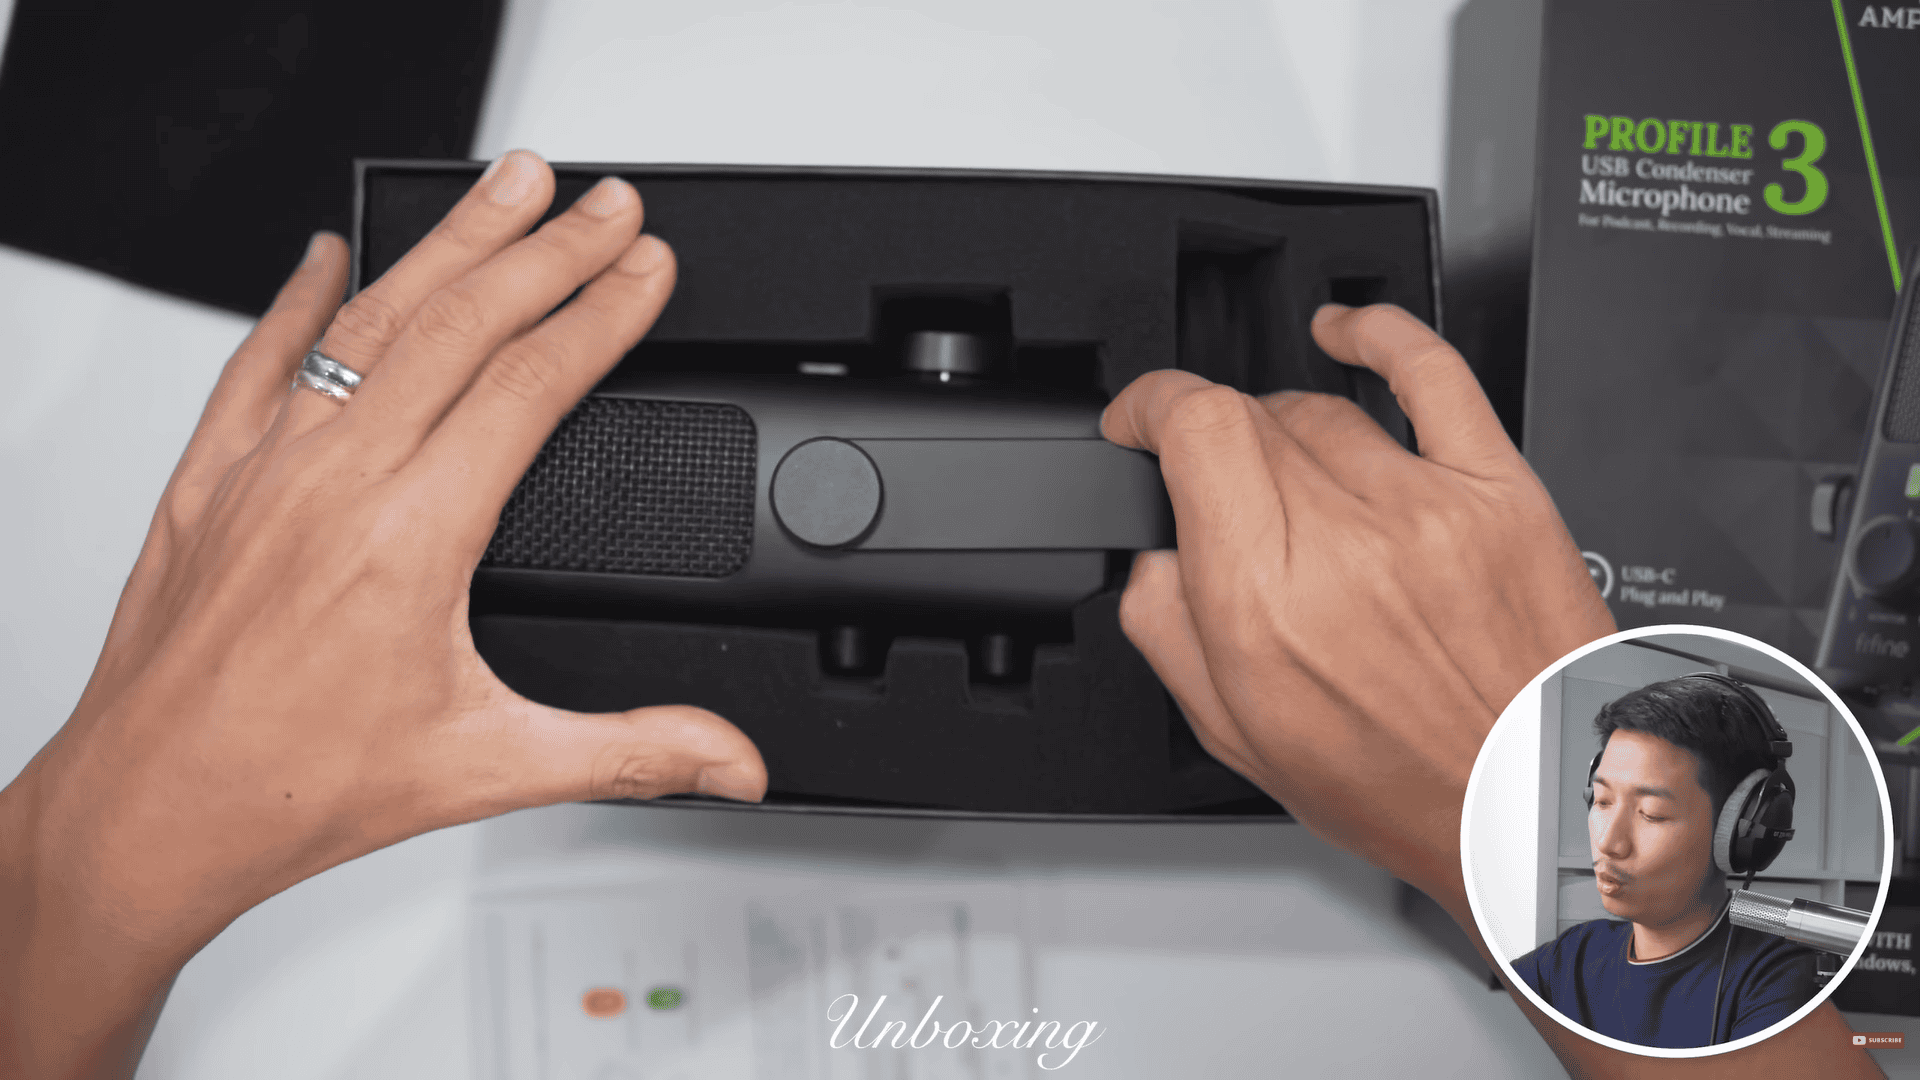

This is arguably the most professional Fifine microphone that I have ever seen. I love how sleek and black it is, and it has no RGB at all. Massive branding with the Amplitank logo, but at this point, they’ve earned it.
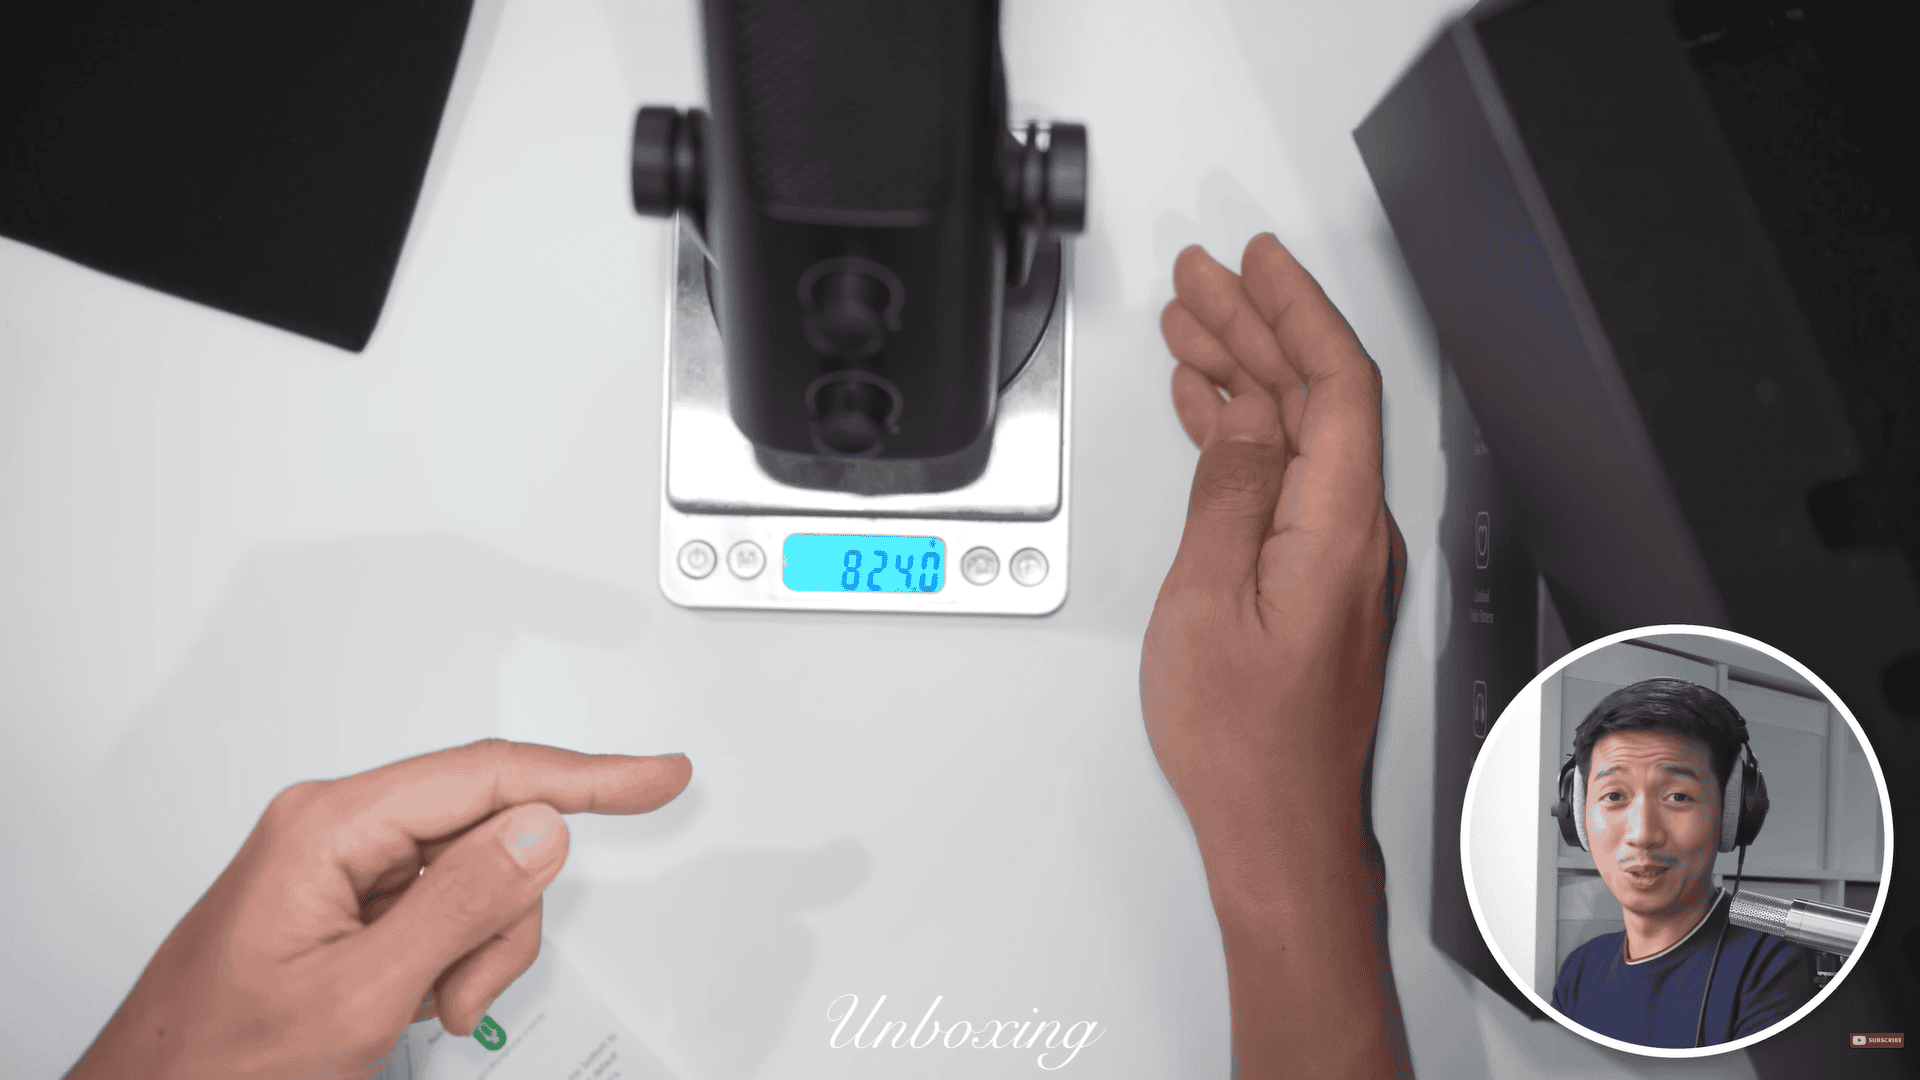
The mic weighs 824 grams and that is heavy. That’s SM7B weight territory. Just as a frame of reference, the Fifine K688 weighs 519 g and the SM7B weighs 839 g. So, it’s just 15-16 g lighter than the Shure SM7B. So, this is Fifine’s heaviest microphone to date. Of course, that does count the stand. The stand of the mic alone weighs 172 g. So, the mic on its own would still be pretty heavy.
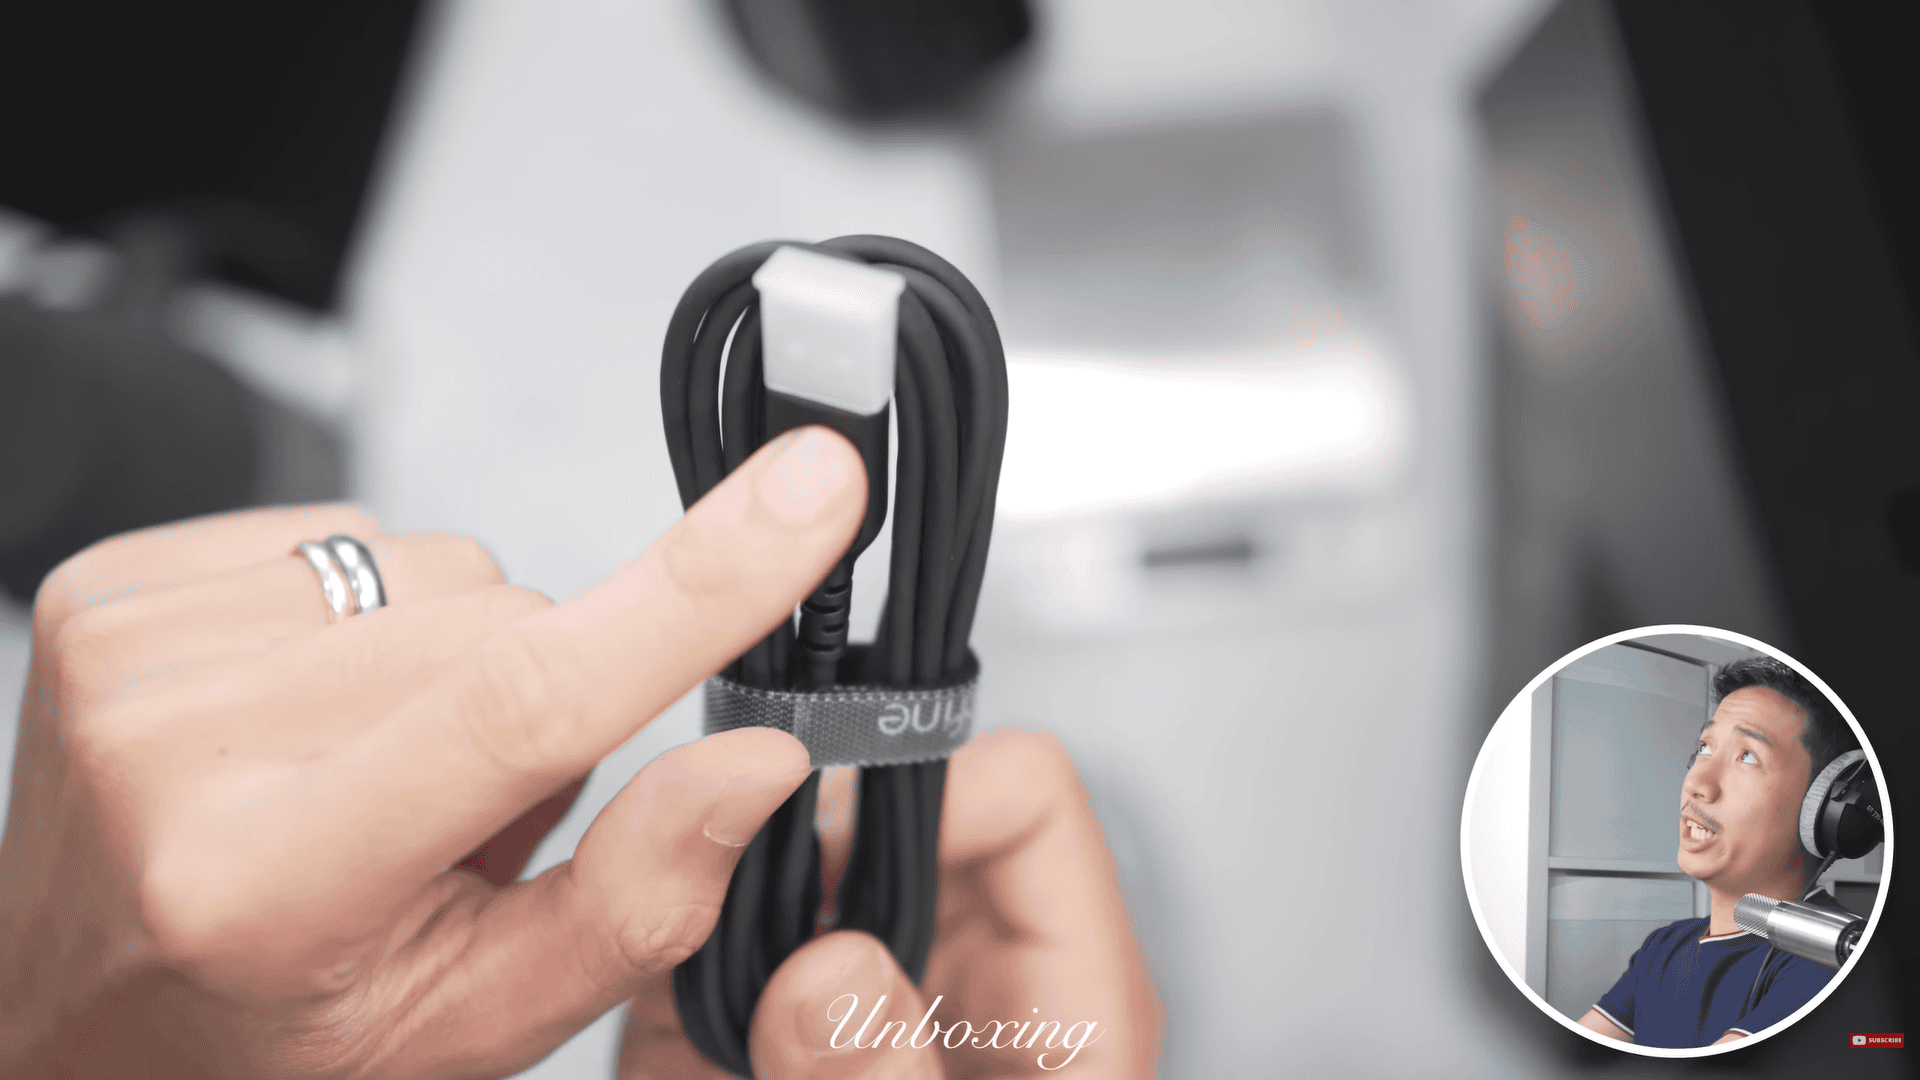
I should mention that it comes with a Type-A to Type-C USB-C cable with no adapters. So, for this review’s purposes, I’m going to use a separate Type-C to Type-C cable so it can connect directly into my MacBook Air.
On my first test with the mic, the Earthworks Ethos practically had no background noise. That’s because my audio interface has a noise-cancelling plugin. So, don’t think that this mic has any white noise or preamp noise because this one didn’t appear to have it. That was the noise-cancelling at work.
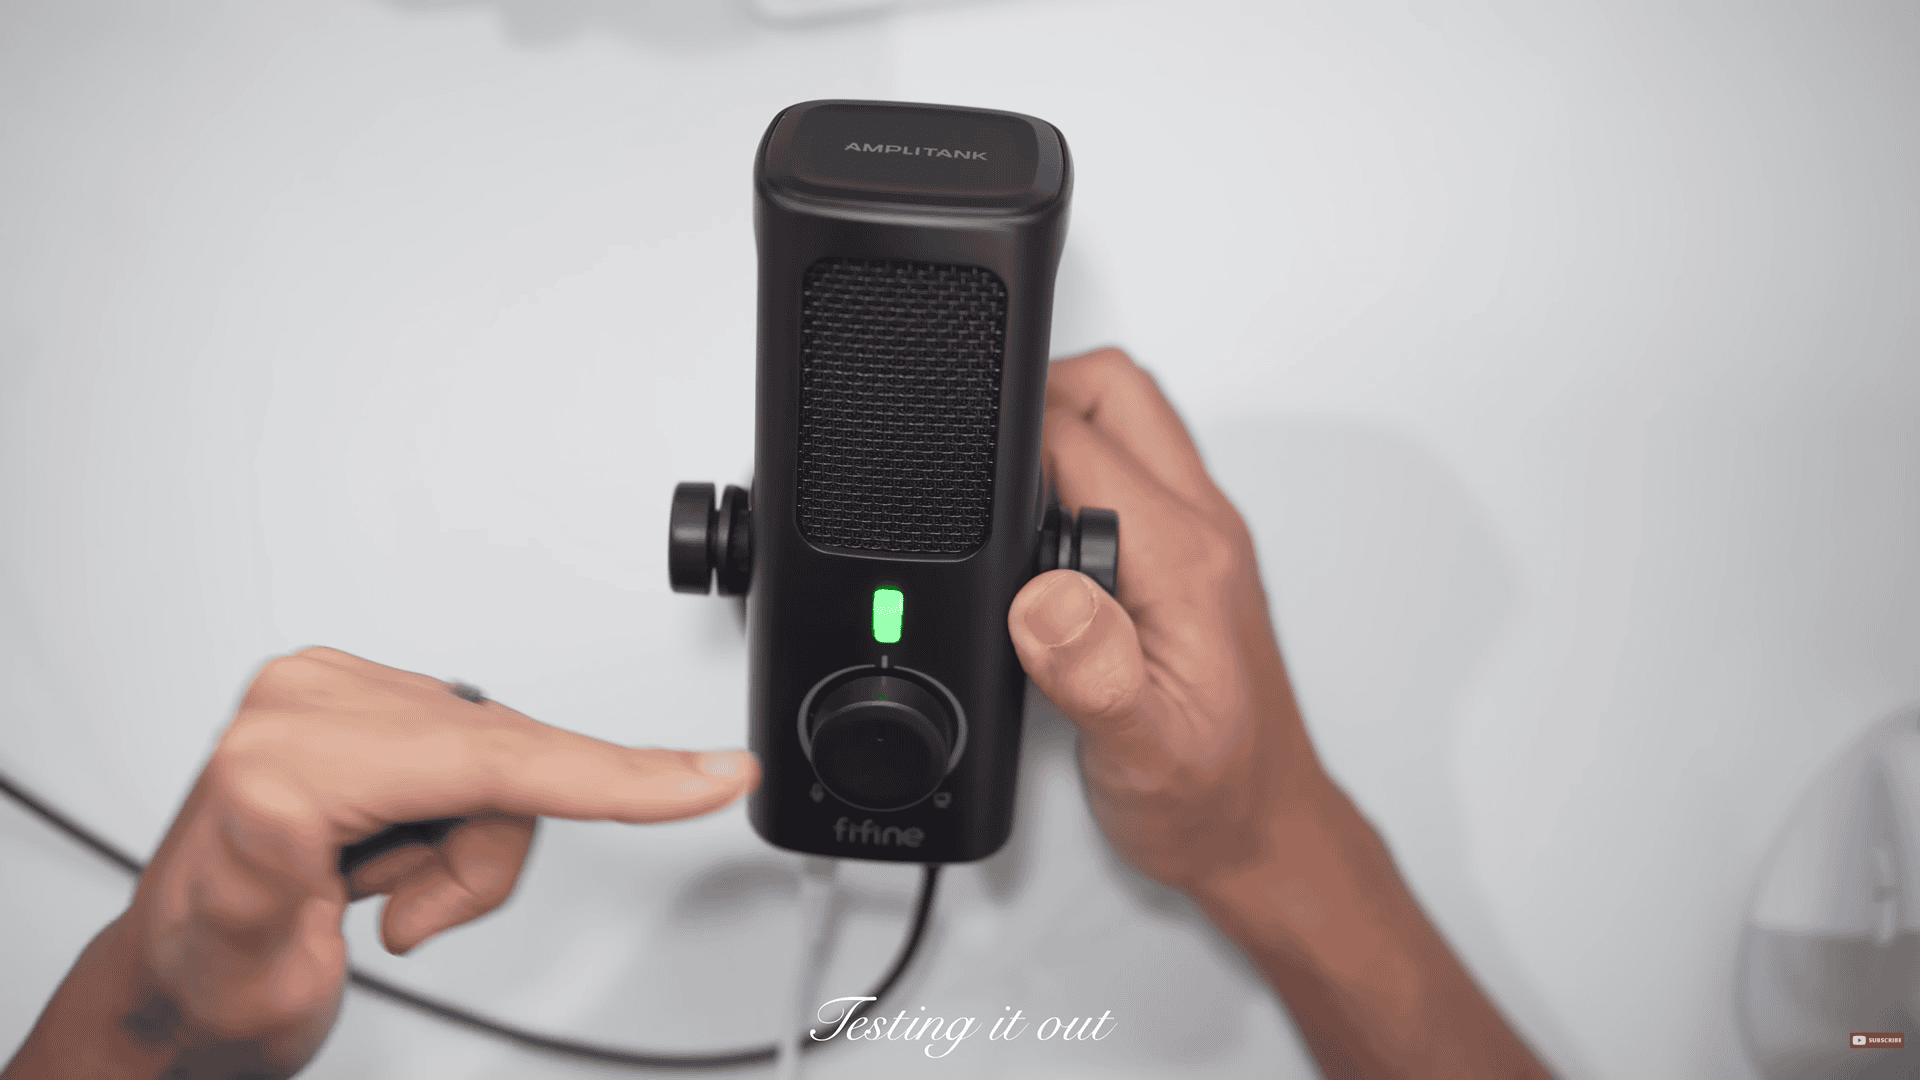
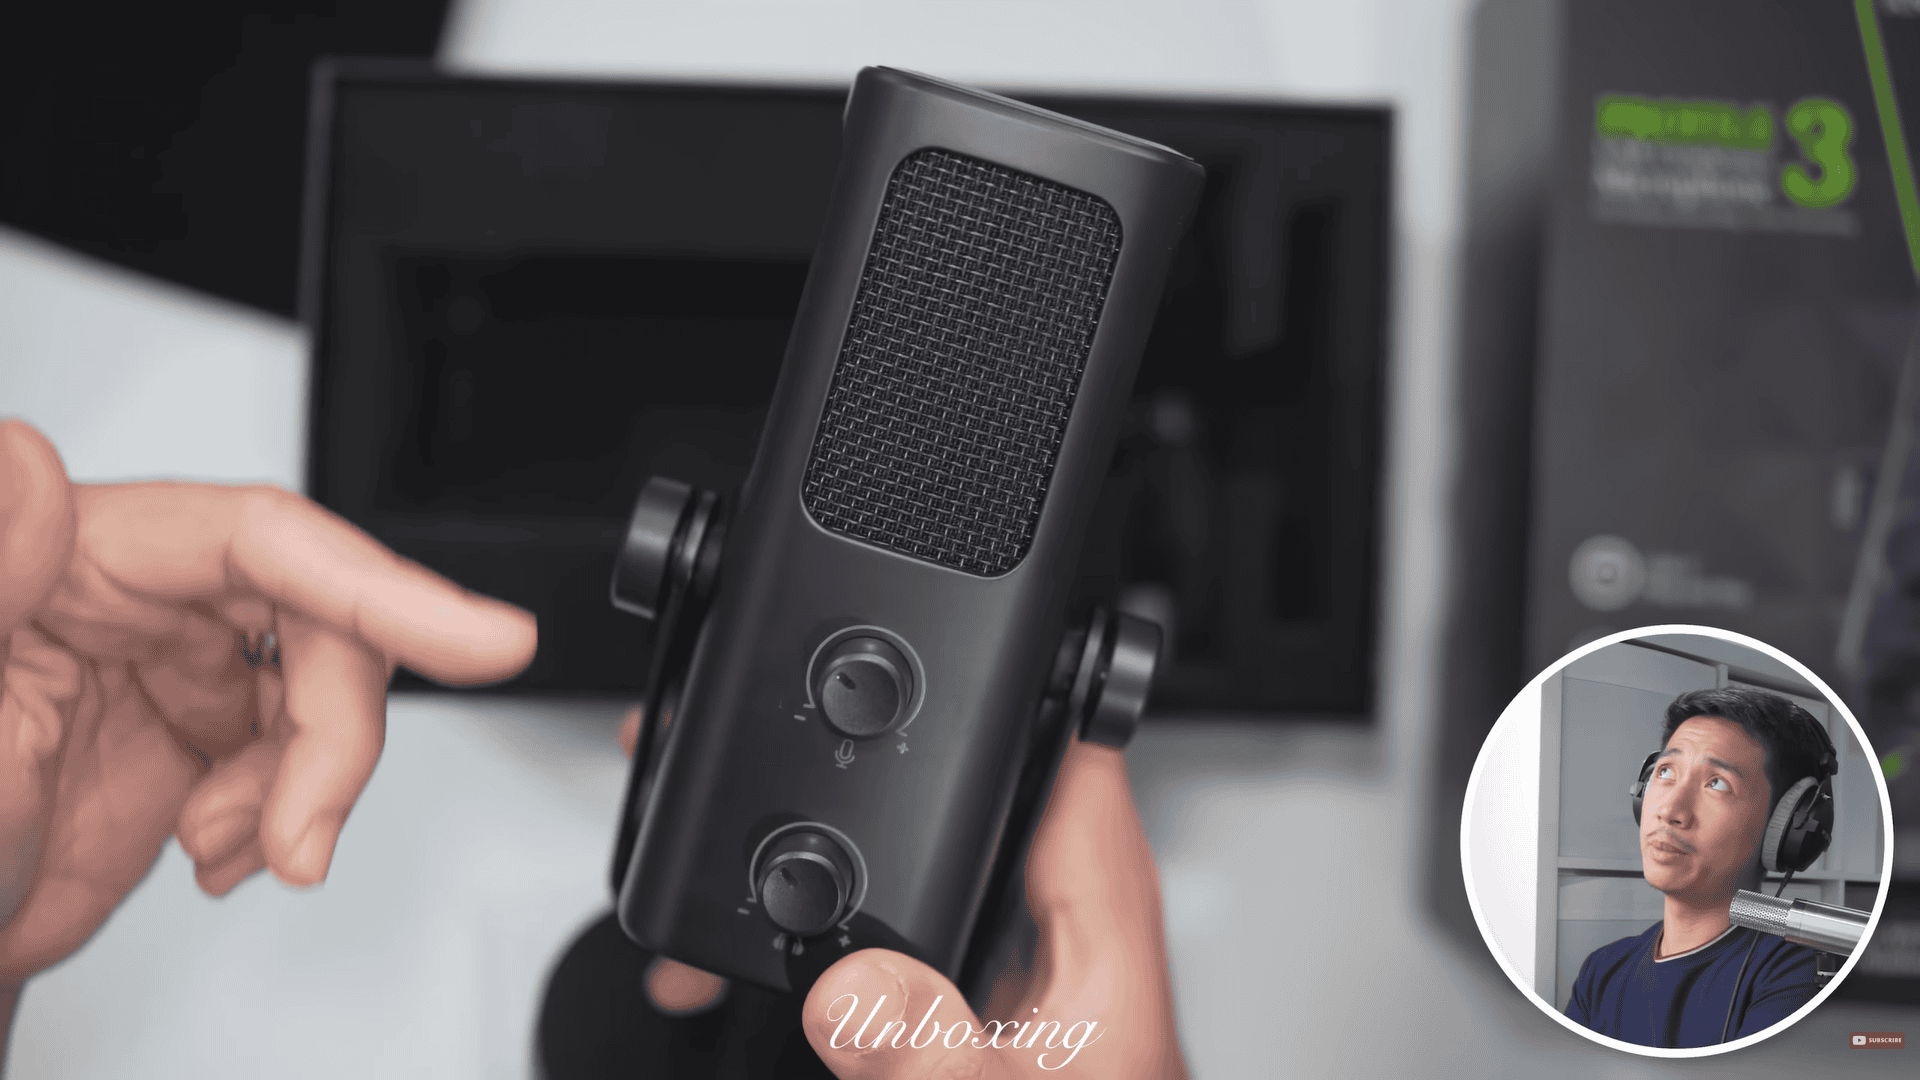
Looking at the features, you have a mute button right there. I love it because it is a gradual mute button that is very dampened. This big knob is what you call your monitor mix knob. But Fifine called this their microphone-computer balance knob, which is the same thing.
Talking into the mic, I have a pair of headphones plugged in and I hear myself live. How the knob works is that it the more I turn it to the left, the more I hear the microphone and hear myself, but I hear less of the sounds coming from the computer. But the more we turn it to the right, I’m going to hear myself less. If turning to the right and you’re on Discord, you’re going to hear the people you’re chatting to more, or you’re going to hear more of a video game sounds.
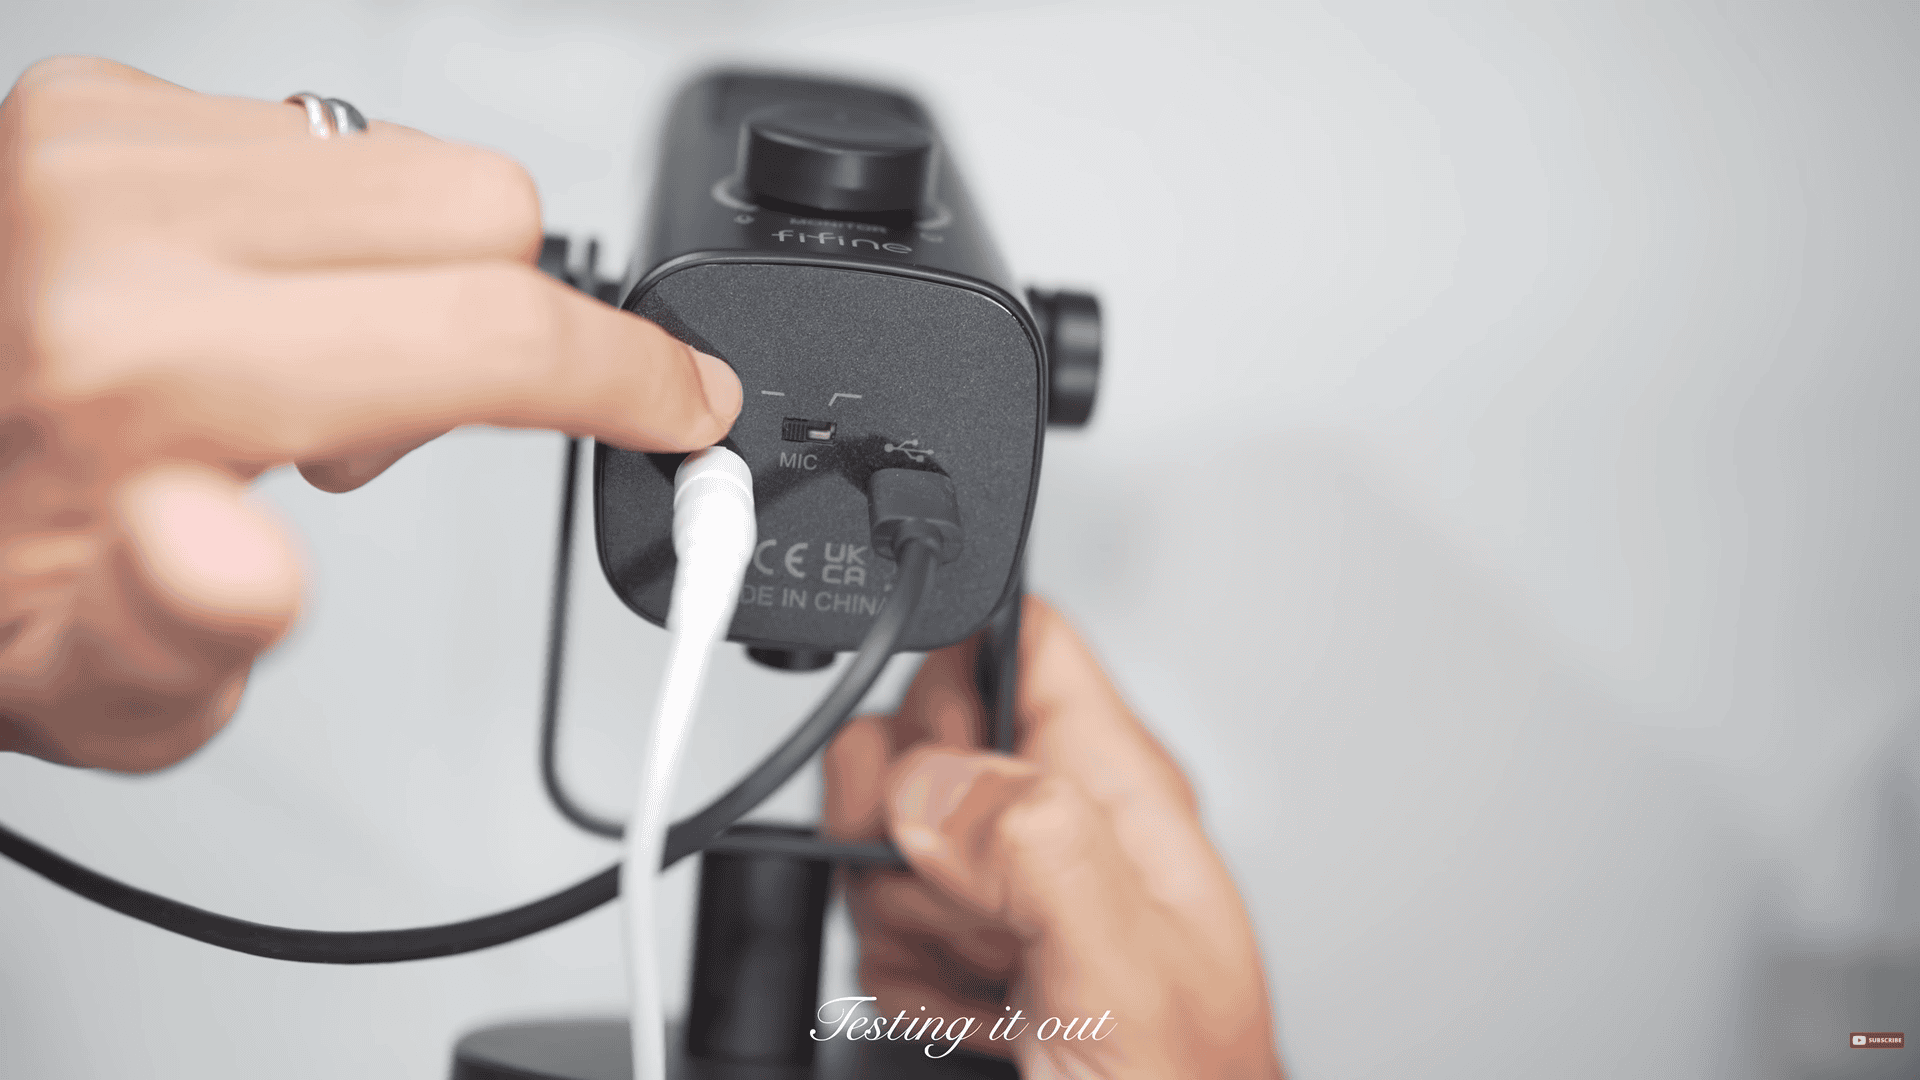
It has what you call a 150 Hz high-pass filter, which can be activated by flicking a switch (the one in the middle where I am pointing at the photo). This is great for reducing low-noise rumble. Example, I’m tapping on a desk and you don’t hear it that much, but when I turn it off, you hear more of that tapping. It’s also great for removing low rumble from trains passing or your fridge, basically, anything that makes a low hum sound.
I love that when you flick that switch on and off, you don’t really hear a piercing clicking sound, which is quite common for condenser mics with switches.

Microphone gain knob at the top, and headphone gain knob to control at the bottom
You have a microphone gain knob to control your microphone gain, and you a headphone gain knob to control your overall headphone volume.
The Fifine Amplitank Profile 3 isn’t just 24-bit, but it also has a sampling rate of 192 kHz, giving it the specs of an audio interface on paper.
Testing it out
So, let’s put this mic to the test.
In the following section, I performed a series of audio tests with the Fifine Profile 3 microphone — timestamps are included below to help you navigate the YouTube video.
Speech Test
What it is: A normal speaking sample at a steady volume.
Why it matters: This is the most “real-life” test for voiceovers, streaming, meetings, and content creation.
How I test: Read a short paragraph at a natural tone and pace.
What to listen for: Does the mic sound natural? Are the mids clear? Is the voice too boomy, too thin, or pleasing and balanced?
Watch here: (5:33–5:42)
Plosive
What it is: Those “boom/puff” hits on P/B sounds when air slams the mic.
Why it matters: Buries words and makes compressors pump.
How I test: “Pesky Ps…” at varying distances; no filter → foam → metal.
What to listen for (simple + tech): Big thumps (mostly under ~150 Hz), sudden level jumps, or clipping on P’s.
Watch here: (5:42–6:04)
Sibilance
What it is: Sharp “S/SH/CH/T” brightness.
Why it matters: Fatiguing highs; often needs a de-esser.
How I test: S-heavy lines at the same volume.
What to listen for: Smooth vs. hissy top end (roughly 5–10 kHz); does “S” stab the ear or sit naturally?
Watch here: (6:04–6:17)
Distance
What it is: How tone changes from close (2″) to medium (6″) to far (12″+).
Why it matters: Balances warmth, consistency, and room sound.
How I test: Same line at varying “finger distances”.
What to listen for: Bassy/proximity while close, and how thin it gets as I get farther.
Shaver Test
What it is: A background-noise test using an electric shaver (or similar buzzing device).
Why it matters: Buzzing noise is steady and mid-high in frequency, which reveals how well the mic rejects or softens constant noise sources.
How I test: Turn on the shaver at a fixed distance and talk over it.
What to listen for:
- Does the voice stay clear on top of the buzz?
- Is the shaver sound mellowed or very sharp?
Does the mic’s noise rejection pattern reduce the buzz when angled correctly?
Watch here: (6:56–7:10)
Polar Pattern
What it is: Where the mic “hears” best (cardioid/supercardioid/omni/fig-8).
Why it matters: Controls how much room and side noise you pick up.
How I test: Screaming around the mic, or using a shaver.
What to listen for: Volume and tone drop off-axis; highs often roll off when you move sideways.
Watch here: (7:10–7:29)
Keyboard test
What it is: A background-noise test using keyboard typing.
Why it matters: Shows how well the mic handles everyday background noise during work or streaming.
How I test: Type normally on a mechanical or membrane keyboard while speaking.
What to listen for: Can you still understand the voice clearly? Does the typing sound muffled or sharp? A good mic keeps your voice on top and softens the key clicks.
Watch here: (7:31–7:55)
Resonance / Mic Arm
What it is: Vibrations traveling through your desk/arm/stand into the mic.
Why it matters: Thumps and ringy overtones print into the recording.
How I test: Light desk/arm taps; move the arm; repeat.
What to listen for: Low “thuds” and “boing” rings that linger under speech.
Watch here: (7:55–8:16)
Guitar
What it is: Mic on acoustic guitar only.
Why it matters: Shows pick attack, body warmth, and string detail.
How I test: Short strum + fingerstyle, matched loudness.
What to listen for: Clear attack, musical body (100–300 Hz), sparkle without fizzy top.
Watch here: (8:29–9:06)
Guitar + Vocals
What it is: One mic capturing voice and guitar at the same time.
Why it matters: Real singer-songwriter setup; bleed and balance are key.
How I test: Short verse/chorus at a practical distance.
What to listen for: Can you understand lyrics without the guitar booming? Does the blend feel natural?
Watch here: (8:29–9:06)
Low Voice
What it is: Baritone/bass delivery.
Why it matters: Tests warmth vs mud.
How I test: Deep phrases at normal volume.
What to listen for: Solid body without muffling; low-cut needed or not.
Watch here: (9:06–9:23)
Medium Voice
What it is: Average speaking range.
Why it matters: “Most people” scenario.
How I test: Neutral script at conversational level.
What to listen for: Natural mids, clear words, no harsh edges.
Watch here: (9:06–9:23)
High Voice
What it is: Bright tenor/soprano or animated read.
Why it matters: Exposes sibilance and edgy upper-mids.
How I test: A short sentence at conversational level.
What to listen for: Controlled esses, brightness without glassiness.
Watch here: (9:06–9:23)
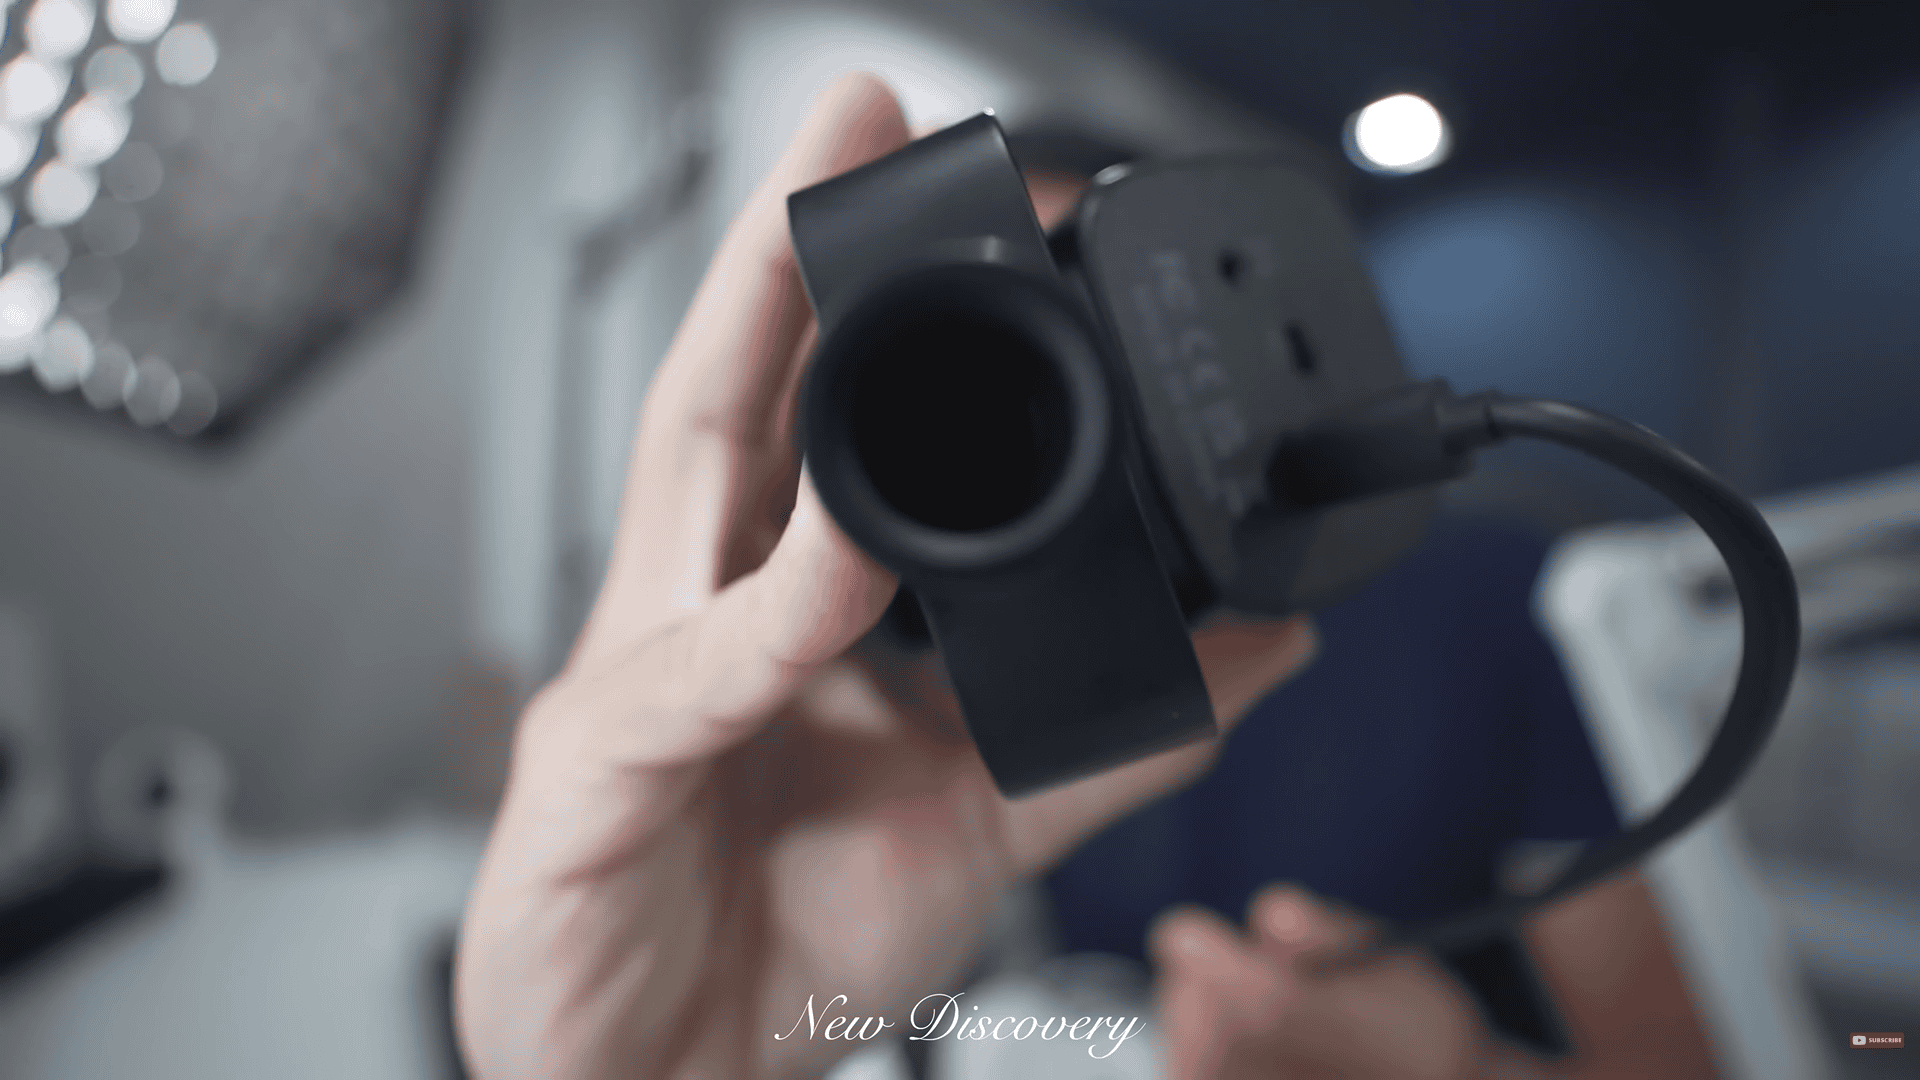
New Discovery
Cool thing I just discovered with this mic is that the yoke mount has both a 3/8-inch thread and a 5/8-inch thread. Right there you can see a hole within the hole, which means you can mount this onto one of those cheap mic arms without an adapter.
Thoughts so far
Now, I really like what I’m hearing so far. And the Fifine Profile 3 has the makings of a mic that could replace your XLR microphone. If you wish to have this mic, click the link below to purchase.
https://link.davesoltura.com/Fifineprofile3
Pros & Cons
Let’s move on to the pros and cons of the mic. Let’s start with the cons, then followed by the positives.
CONS
Con 1: No adapter
The included USB-C cable for the mic only includes Type-C to Type-A without an adapter. Not a dealbreaker, just unfortunate because most of these mics do come with adapters nowadays.
Con 2: Unclear without high-pass filter
It can sound a little unclear if you are not using the high-pass filter—though for the average listener it just sounds big and full. Turn on the high-pass if clarity becomes concerning.
Con 3: Sensitivity
The mic isn’t super sensitive. On max gain you still need to speak fairly close for spoken word to get strong levels.
Con 4: Background noise
It will capture background noise—that’s normal for condenser mics. You capture more nuisance in detail from your voice but also way more noise from the background.
PROS
Pro 1: Robust
Robust, great-looking build quality, which also look good on camera.
Pro 2: True audio-interface-level specs
True audio-interface-level specs, for analog to digital conversion. I’ve always wanted Fifine to have a 24-bit microphone, and they did just that and over-delivered. They also raised their base sample rate to 192 kHz which is 4x compared to the past. For professional clients this specs matter.
Pro 3: dB signal-to-noise ratio
77 dB signal-to-noise ratio—excellent for a USB mic. Its such a key detail for me since you’d hear more of your voice and less of pre-amp noise.
Pro 4: Analog 150 Hz high-pass filter
It has an Analog 150 Hz high-pass filter, which means softwares aren’t needed.
Pro 5: Dampened switches
Nicely dampened switches. It has minimal clicking.
Pro 6: Monitor mix knob
Dedicated monitor mix knob—rare on USB mics. I’m not sure but it might be the first Fifine mic with this feature.
Pro 7: Studio-ready frequency response
It has a studio-ready frequency response: 70 Hz – 20 kHz. I find this the perfect range for a studio microphone.
Recommendation
The mic is perfect for anyone stepping into serious recording who wants pro-level results without an external interface. So that is a good fit for those who are into voice acting, singing, podcasting, and doing indie music. Not the first choice for untreated gaming/streaming rooms, but an outstanding entry-level “good enough for paid work” USB microphone—and a great travel mic too.
Overall
This is easily Fifine’s best microphone to date.
For the price you’re getting budget XLR quality with high-end interface specs. It almost has no real flaws, and it has insane value that I’d give it a 9.5–9.7 out of 10 rating. I can be nitpicking, but there are small areas it can improve such as the signal-to-noise ratio, but other than that it can be a perfect 10.
Fifine, we just asked for 24-bit… you went way overboard—in the best way.
What did you think of the Fifine Profile 3? If this is a mic that you wish to have, you can purchase it with the link below: